Disclosure: Some links included in the sidebar and article are affiliate links, which means we receive a small commission at no cost to you if you purchase through a link.
Not surprisingly, with COVID-19 keeping so many people at home currently, there has never been a better opportunity for putting together and selling an online course and I’m receiving lots of enquiries on how to create an online course with WordPress.
I’ve just finished putting together an online course for a client so thought it timely to write about the process and how I went about it. Working out how to create an online course can quickly become very complicated or expensive.
Is it a Starter Course or More Indepth?
Before you dive in, it’s important to decide on the type of course and its price point. In this case the client required a starter course selling at less than $100. This made it an ideal opportunity for what I cover in this article.
The client is a baby massage instructor and wanted to put together a basic, starter course focusing on techniques to help with colic. The course consists of approximately one hour of video content separated into modules and a number of Adobe Acrobat (PDF) files.
Since the course requirement was simple and did not require content such as quizzes, certificates or progress tracking, we opted to use a membership plugin instead of an LMS (learning management system) plugin.
As the name suggests, a membership plugin enables you to include content on your WordPress website with limited access. This was the ideal solution in this case since the only requirement was to ensure that only those that had purchased the course could access the content.
If you are looking at how to create an online course with WordPress for an in-depth signature course with many hours of content (something which could cost hundreds or thousands of dollars) then you are likely to need something more substantial than what I cover in this article.
For more advanced, expensive courses a full blown LMS may be required. An LMS is a more traditional online course environment which uses lessons and includes items such as progress tracking and certificates of completion. If you’ve ever participated in a course offered via platforms such as Kajabi or Teachable then you’ve already experienced an LMS environment.
You can find out more about both membership and LMS plugins and how they differ, to help you choose what suits your requirements in this excellent CourseMethod.com article.
What Equipment and Software Will I Need?
When looking at how to create an online course with WordPress, you are going to need various pieces of equipment and software to put it all together.
The list can mount up very quickly but will include a camera and microphone and software. If you don’t have thousands of dollars to throw at putting this together, don’t despair. You can come up with something perfectly adequate with a shoestring budget as I’ll demonstrate.
This course was put together without the need for any software involving a monthly cost. In fact the only item with a monthly cost is the website’s hosting. As you will see later in the article, I used several pieces of software which have a minimal outlay, costing little more than $US100.
These were both available also as a one-off lifetime purchase but I prefer to support software vendors whose products I am using on an ongoing basis. So I opted for an annual payment.
Camera and Microphone
The course mainly involves the demonstration of techniques on camera which are also explained in supporting PDF files. There’s no need to spend big money on a camera and microphone if you don’t have it!
In this day and age, even an inexpensive camera has plenty of grunt to produce sufficient video content.
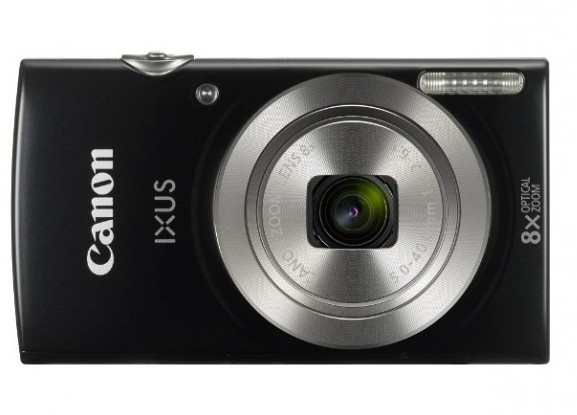
For this project, I used a Canon IXUS 185 camera which you can buy for less than AU$150. It produces HD (high definition) videos and is no slouch with a 20.7 megapixel resolution. It has an inbuilt microphone which I do not recommend using unless producing videos where you are no more than a few metres away from the camera.
We made the mistake of solely using the Canon camera. For future projects like this I will use separate video and audio tracks and then bring them together in the video editing application (see my comments later in the article about Wondershare Filmora which I used). The video editing app makes it easy to separate the audio track and then simply discard the camera’s audio.

For the sound I recommend either using an external microphone connected to your computer or smarphone or lapel microphone. The lapel microphone is ideal for projects where you are going to be standing up and talking to the camera.
The microphone I purchased cost less than AU$20 delivered and does a perfectly adequate job. It is a model SF-666 Codenser Microphone. You can also use a lapel microphone if you are going to be standing up and talking to the camera.
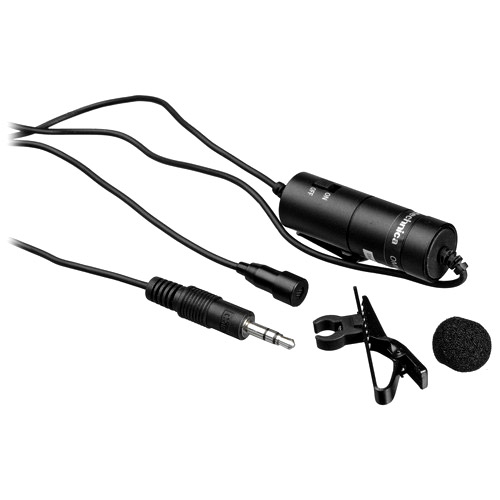
I recently purchased an audio-technica lapel microphone model ATR3350iS (photograph shown above). The plan was to use this with a Nokia 2-3 Android phone to record the sound track separately.
However, frustratingly, I discovered that not all smarphones will work with the smartphone adaptor that came with the lapel microphone and yes, you guessed it, the Nokia 2-3 is one of them! I did some research on this topic and it is a bit hit and miss which smartphones will work with these adaptors.
You could use a bluetooth microphone with your smartphone to get the hands-free benefits.
Cloud Storage for Course Content
Something else you will need to consider when putting together your online course is where you can store the content such as reading materials and videos. Website hosting environments are not an option because they are not intended for the storage and playing/streaming of videos.
You will need to make arrangements to host your videos in the cloud for your course.
There are lots of options available and we decided to use Amazon’s Simple Storage Service (Amazon S3). Depending on your requirements, Amazon’s Cloudfront service may also be of use with its global content delivery network (CDN).
It is inexpensive, reliable and has file security options which can be used to protect your course content. I’ve covered this further in the section of this article where I cover the S3MediaVault.com WordPress plugin.
Video Editing
To edit the videos I used Wondershare’s Filmora video editor. It is inexpensive and straightforward to use with good documentation and plenty of instructional videos.

I used it extensively to do the following tasks:-
- Remove mistakes/unwanted video content sections.
- Trim and amplify audio which was too low in volume from the Canon camera.
- Add intro titles and titles throughout where needed.
- Add transitions to the video clips.
The WordPress Plugins Used
I decided to build this course website on a separate sub-domain using a selection of plugins. For this project, I spent many hours researching WordPress membership plugins. Trust me when I tell you this is no easy task.
A search for the word ‘member’ in the Add Plugins section of WordPress lists a whopping 2,375 plugins! To do this, I used the criteria that I recommended in my Tips to Select Your WordPress Plugins article.
I’ve discussed each of the plugins used later in the article and their purpose and they are as follows:-
- Elementor page builder
- Paid Memberships Pro
- S3MediaVault.com
Elementor Page Builder
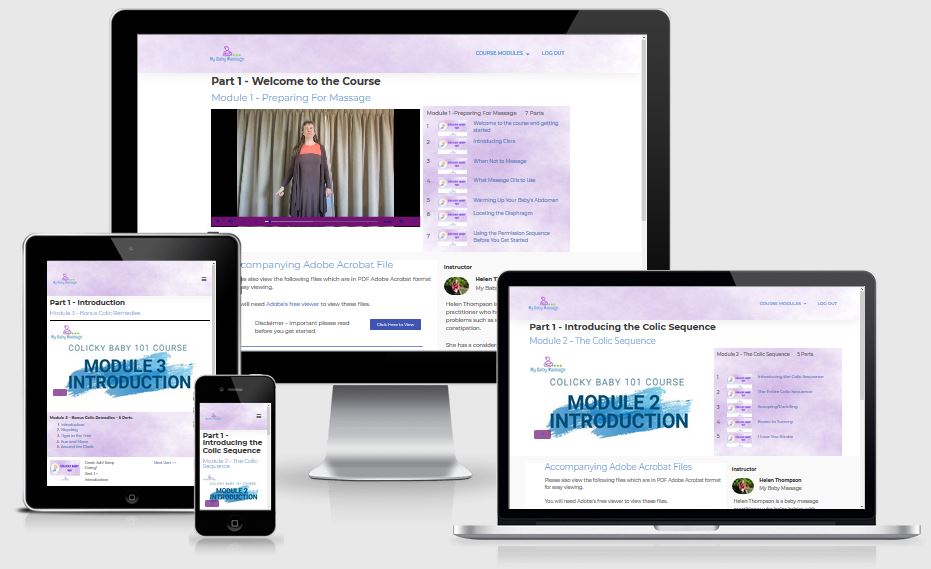
Using the Elementor page builder, I designed a simple layout which was similar to a course that I had recently seen in the Kajabi LMS. As you can see from the screenshot below it is easy to navigate and the video content is displayed prominently in the left hand panel of each module section.

This can easily be done using the free version of Elementor. The main advantage in using Elementor Pro (I use this for all websites) is the use of the theme builder which enables the easy design and inclusion of the header and footer.
I also ensured the layout rendered nicely across all devices which it does as you can see below.
The Elementor pro version’s inbuilt form and popup functionality were also handy because I was able to easily include a form and popup to solicit feedback at the completion of the course.
If you’ve not come across Elementor before then I recommend checking out the article I wrote on the Elementor for WordPress page builder. I also included a brief video walkthrough of the Elementor page builder which I’m sure you’ll find interesting.
Paid Memberships Pro Plugin
Paid Memberships Pro is a WordPress membership plugin which enables you to convert a WordPress website into a membership based environment. You can use Paid Memberships Pro for free or purchase their Plus or Unlimited versions.
You can do a lot with their free version but you have no access to any support from them. Customers of their Plus or Unlimited versions have access to excellent support and hundreds of add-ons that add features and functionality as well as integrating with third party services.
They have excellent documentation and a good YouTube channel which I found very helpful. If looking at the free version, you’ll need to do your homework before using this plugin to ensure that you can get access to all the functionality you need. You’ll also need to be sufficiently confident in your ability to use the plugin without any support from them.
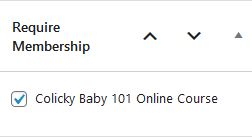
When adding pages to your WordPress website, you can specify whether or not the viewer needs a membership or not to be able to view them.
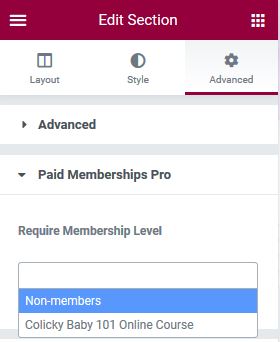
Paid Memberships Pro also has an excellent integration with the Elementor page builder giving you additional opportunities. Using them together, you can set who can view each Elementor section on your website pages. You can either make it accessible to members or non-members.
This provides you with marketing opportunities such as promoting your course or perhaps even for upsells that unlock additional content such as video content etc. I didn’t use this functionality for this online course because it had its own separate sub-domain.
S3MediaVault.com
The biggest concern I had when asked to build this online course website was in relation to the video and Adobe Acrobat (PDF) file security. It’s all very well to use a WordPress membership plugin to ensure that the pages can only be viewed by your online course clientele. However, there’s another aspect of security that needs to be considered.
You need to ensure that your course video and PDF content cannot be shared freely on the internet. As mentioned earlier, web hosting is not a suitable environment for video files. Any files stored in your hosting environment can be shared with others so your online course content can easily be compromised.
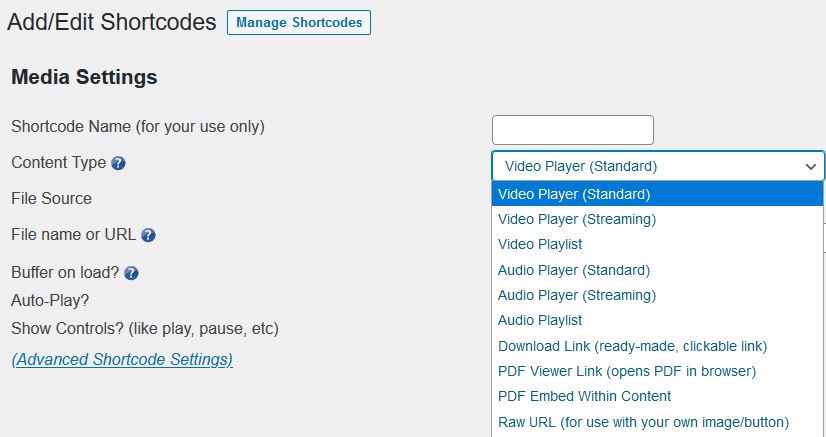
To get around this, the S3MediaVault.com plugin protects and securely embeds video, audio and PDF files into your WordPress website. These files can be stored in either Amazon’s S3 or their Cloudfront environment. This plugin provides a secure video player for the video content.
S3MediaVault was launched in 2009 and I found it easy to set up and use it. They have very helpful, easy to follow instructional videos to get you up and running. You simply need to set up shortcodes which is easy to do via the interface.
So that covers everything I went through when looking at how to create an online course with WordPress. I spent many hours researching this project and putting it all together and I hope you find what I shared helpful.
Have you put together an online course to date? What LMS or membership plugin did you use for your course? Please let me know in the comments below.