

Disclosure: Some links included in the sidebar are affiliate links, which means we receive a small commission at no cost to you if you purchase through a link.
You work hard, right to put together quality content? So why reinvent the wheel when you’ve already done the hard yards? I’m going to show you how to convert a blog post to video quickly and easily so stay tuned.
One of the most effective ways to boost your content marketing is to repurpose your content. Instead of just writing a blog post, why not also learn how to convert a blog post to video?
When it comes to repurposing content, videos are an ideal starting point. People prefer watching them to reading and they get great engagement. In the following video, I shared some highly compelling statistics on why videos are a favorite with marketers.
Creating Videos Can be Challenging
When I suggest to my clients converting blog posts into videos, the alarm bells immediately sound. There’s loads of ‘buts’ and ‘hows’.
You’re no doubt thinking to yourself “Is this guy for real! How can I produce a video in a matter of minutes instead of in hours or days”
In this post, I’m going to show you how to convert a blog post to video quickly and effortlessly. Many of the people I suggest this to immediately throw up objections to needing to learn and use multiple, complex software applications to assist them to:-
- Produce visuals and slide layouts
- Find background music and purchase a licence to use it
- Include voiceovers that need to be recorded and edited
- Edit raw video footage
You’ll be pleased to know there’s a way how to convert a blog post to video where you don’t need to worry about any of these!
Producing a video when you need to take care of all this and more, quickly becomes time consuming and stressful. In this article I’m going to show you how to convert a blog post to video using a simple to use application.
No Need to Appear on Camera
As you will see in the coming demonstration, the videos I am suggesting you create do not require you to appear on camera. They are done in more of a slide show format.
You have the option of including camera footage if you want to, but this will defeat any goal of creating your video quickly.

The thought of appearing on camera frightens many so you may even breathe a sigh of relief!
I recommend not including any camera footage since repurposing your content quickly is the goal here. Dealing with the likes of filming, lighting and editing add considerable work to a video and you want something you can produce and upload quickly and without delay.
Introducing Vidnami
The application that I’ve used for some years for converting blog posts into videos is called Vidnami (previously it was known as Content Samurai but was renamed during 2020). Perhaps being an Aussie I’m a little biased because it’s an Australian product but as you’ll see it’s a great option and very easy to use.
Vidnami offer a free 14 day trial so you can easily try out this process yourself with no obligation. You can find out more about their trial here.
Let’s Get Started
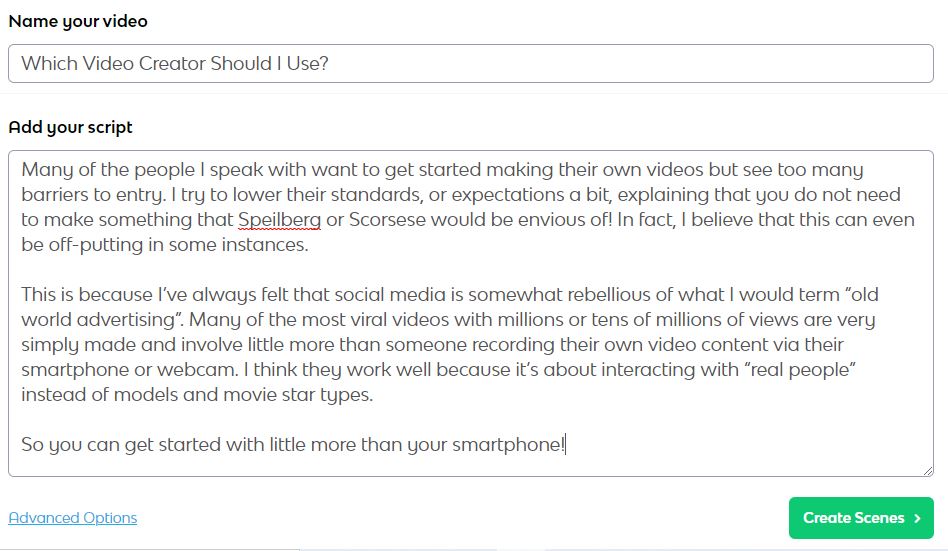
Now let’s get into how to convert a blog post to video. For this demonstration I’m going to convert an excerpt from my Which Video Creator Should I Use article.
Vidnami is an online application so there’s no need to install anything whatsoever on your computer. You access everything you need via your Google Chrome browser. It’s designed to be simple to use and does not require a steep learning curve to get up and running. You’ll know how to convert a blog post to video in no time!
To get started you enter the text of your video which can be copied and pasted quickly and easily from your original blog post. You’re then ready for Vidnami to create your scenes (think slides).
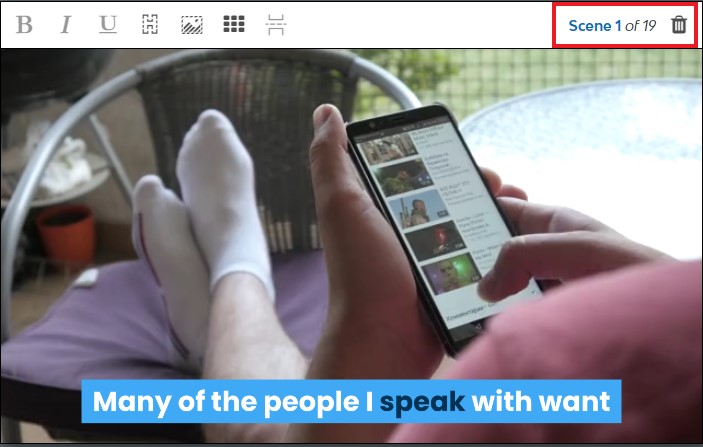
Within seconds Vidnami produces a video based on your script. Vidnami does this by analysing your script text, producing a series of scenes. Each scene contains a background video clip.
As you can see, my script has been split into 19 scenes.
Within seconds Vidnami produces a video based on your script. Vidnami analyses the text and produces a series of scenes (think of slides) each of which contain either a background video clip or images.
Vidnami interfaces with Storyblocks , selecting video clips which its AI (artificial intelligence) engine thinks are relevant to your topic. Typical of all things AI, it often doesn’t select the right video clips for your topic so you’ll often need to change it.
This is a very quick and straightforward process.
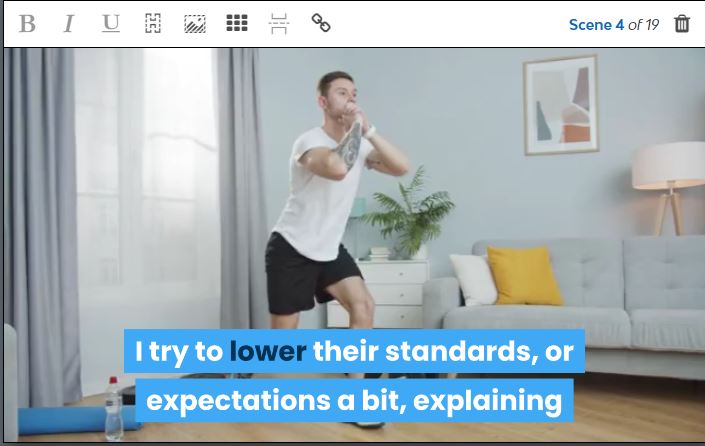
In this particular example from the video, it has chosen a video clip which is not relevant to the text. It has based its search on terms such as ‘lower’, ‘expectations’ and ‘standards’ which are a little vague and ambigious.
A man doing what looks like stretches or an exercise program is clearly not the background video that I want playing here!
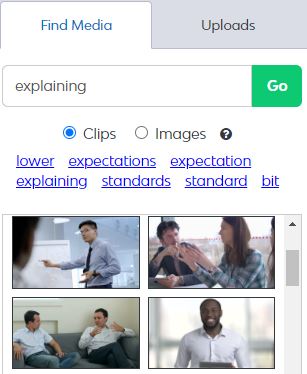
I’ve now considered what sort of impression I want to convey here and I’ve tried entering the word ‘explaining’ instead. As you can see it has found some video clips which are better suited.
I’ve spent a few minutes on the video selecting some better suited video clips and I’ve ended up with a final video with 15 scenes.
Adding a Voice Over
Now that my video scenes are all done, I’m ready to add a voice over to my video.
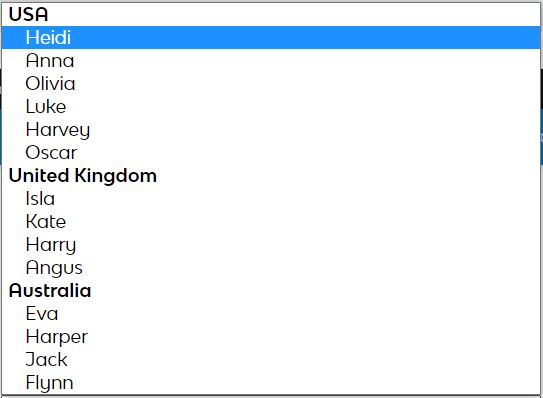
This is incredibly simple to do in Vidnami and you can choose from a range of male and female voices speaking in English with either a USA, British or Australian accent. You can slow or speed up the voice speed as well as adjust its volume for the video. It’s that easy.
Adding a Background Music Track
Now that you know how to convert a blog post to video and your video and voiceover are ready, the final step is to add a background music track.
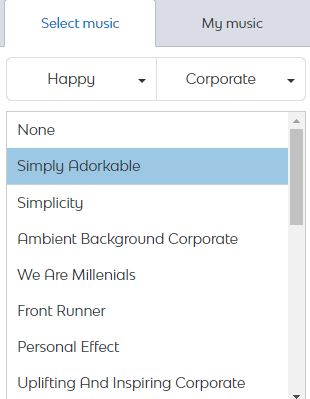
Vidnami integrates with StoryBlocks to provide you with access to 30,000 music tracks which you can immediately include at the push of a button. There’s no need to trawl the internet looking for music and pay for licensing. You simply enter the required mood or genre and sample the music until you find something you like.
Ready, Set, Go
Once you’ve selected your music you can preview and then render your video, it’s that simple. At the push of a button Vidnami generates your video as an MP4 file which you can download.
So there you have it I’ve covered how to convert a blog post to video from start to finish. A video complete with a voiceover and background music completed in approximately 15 minutes. It would probably take me about an hour to do the entire blog post instead of just this small section of it.
Using Vidnami, you can repurpose blog posts as video quickly and easily .All you need to do now is upload it to the required platform and you’re set.
Here’s the final video that Vidnami generated.
Wrapping It Up
Now, this post has only touched the surface of what can be done using Vidnami focusing on how to convert a blog post to video quickly and easily. There is a lot more you can do with it such as:-
- Including your own voiceover or a professional third party voiceover
- Including your own content such as videos, images or music
- Customising the colours
- Produce influencer style videos where you appear on camera
Why not checkout Vidnami’s free 14 day trial and get creative.
Have you started converting your blog posts to video yet? Have you tried Vidnami or any other tools and if so, how did you get on?
Please share your experiences in the comments below.
A tiny request: If you liked this post, please share this?
I know most people don’t share because they feel that we don’t need their “tiny” social share. But here’s the truth…
I built this blog piece by piece, one small share at a time, and will continue to do so. So thank you so much for your support, my reader.
A share from you would seriously help a lot.
Some great suggestions:
– Pin it!
– Share it to your favorite blog + biz Facebook group
– Tweet it!
– Share it on LinkedIn!
It won’t take more than 10 seconds of your time. The share buttons are right here. 🙂